Azure Logic Apps for developers
Azure Logic Apps enable developers to define workflows in a visual way and connect existing services with custom blocks. I tried to go beyond the “Hello, world” sample to see Logic Apps in action: with Web APIs, Webhooks and Azure Functions.
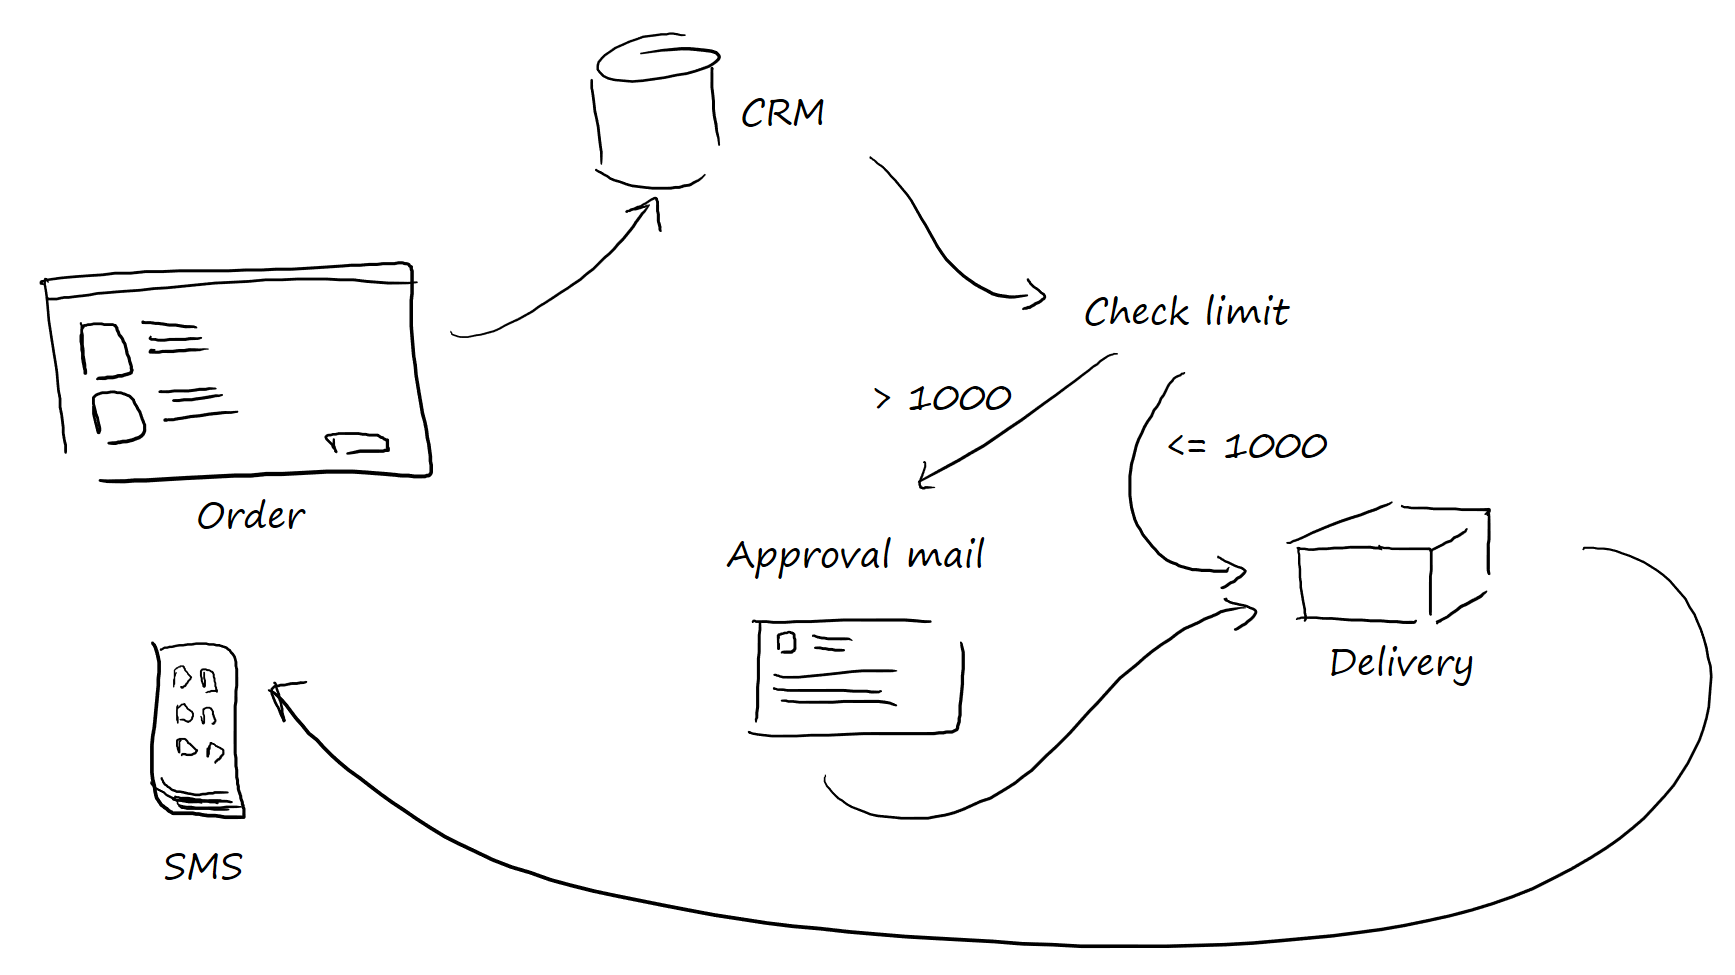
Imagine the following requirements of a typical order process: whenever a new order comes in, several steps are necessary:
- get additional customer data from the CRM
- check the total amount and send an internal approval mail if necessary
- send a delivery notification to your customer via SMS
With Azure Logic Apps this process can be built with hardly any code. Let’s take a look.
Create a Logic App
You can create Logic Apps in the Azure Portal (and design them in your browser) - or you use Visual Studio for that. I’ll show you both ways and start with Visual Studio.
- Install the Visual Studio Extension for Azure Logic Apps (at that time only Visual Studio 2015 is supported)
- Create a new project based on template Cloud > Azure Resource Group called LogicAppOrder
- Add Logic App Template
- Open LogicApp.json in Logic App Designer (right click)
- You can see the available triggers as a starting point for your workflow. We’ll choose the first one: When a message is received in a Service Bus Queue

Create a queue
Whenever an order is placed, I just want to insert a message in this queue: extremely fast, extremely scalable in the subsequent processing, no dependencies to other systems.
- Create a Service Bus
- Create a Queue named orders
- Add a shared access policy (only listen is required)
- Switch to your Logic App and set up the connection of the queue (using the connection string from the just created shared access policy)
Deployment
When using Visual Studio (or a build server) you can use the generated PowerShell script in your solution to deploy your Logic App to Azure
- Open Windows PowerShell ISE as administrator
- Open the .ps1 file generated by Visual Studio
- Add an additional parameter to the last call (New-AzureRmResourceGroupDeployment, around line 116:
-LogicAppName LogicAppOrder - Login to your Azure account with Login-AzureRmAccount
- Execute script
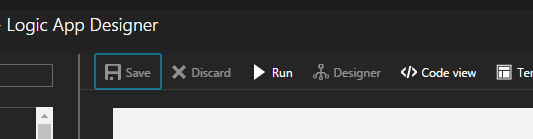
From now on you can design your workflow using the Azure Portal as well - choose what’s appropriate.
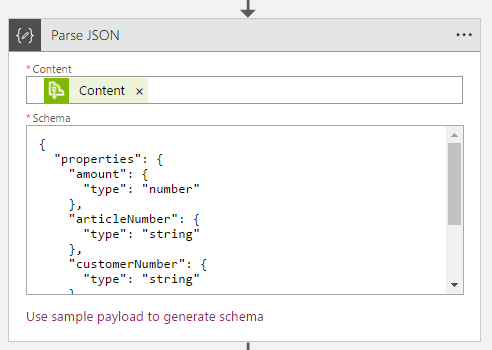
Parse JSON
The first step in our workflow will be the parsing of the JSON payload. Imagine the following data that is present in our queue message:
{
    "customerNumber": "12345",
    "articleNumber": "A1000",
    "amount": 100,
    "pricePerItem": 12.6
}
In our workflow we currently just have access to the Content property of the queue message - let’s parse that content to get 4 properties.
- Add an action Data Operations > Parse JSON
- Use the Content property of the message as Content parameter for the action
- Click on Use sample payload to generate schema
- Copy and paste the above JSON sample data
Call a Web API
The next step is to call an API to get some additional customer contact information. Let’s build a small Web API to simulate that.
- Create a new ASP.NET Web Application project
- Choose Empty and add Web API
- Create a CustomerController
public class CustomerController : ApiController
{
    [HttpGet]
    [Route("api/customer/{customerNumber}")]
    public Task<Customer> GetCustomerById(string customerNumber)
    {
        return Task.FromResult(new Customer()
        {
            CustomerName = "Roman Schacherl",
            Email = "roman.schacherl@softaware.at",
            PhoneNumber = "+436644633397"
        });
    }
}
public class Customer
{
    public string CustomerName { get; set; }

    public string Email { get; set; }

    public string PhoneNumber { get; set; }
}
- Add Swashbuckle as a NuGet package to enable Swagger
- Add TRex as a NuGet package to specify additional Metadata attributes used by the Logic App Designer
[HttpGet]
[Route("api/customer/{customerNumber}")]
[Metadata("Get Customer Details", "Gets details of the customer")]
public Task<Customer> GetCustomerById(
    [Metadata("Customer number")]string customerNumber)
{
    // ...
}
- Enable TRex in your SwaggerConfig file
public static void Register()
{
    var thisAssembly = typeof(SwaggerConfig).Assembly;

    GlobalConfiguration.Configuration
        .EnableSwagger(c =>
            {
                c.SingleApiVersion("v1", "LogicAppOrder.CRM");
                c.ReleaseTheTRex();
            })
        .EnableSwaggerUi(c =>
            {
            });
}
- Deploy the Web API to an Azure API App
- Check the API > API Definition setting in Azure portal (URL must target the swagger config)
- Set CORS policy in Azure portal to * (or, to make it more secure, set it to the source URL of your logic app)
- Add an Azure App Services action to your workflow
- Choose the newly deployed Web API and pass the customerNumber value as a parameter

Azure Functions
Next we want to check if the total amount of the order is below 1,000 $. If not, the order cannot be processed automatically and an approval mail should be sent.
- Add a new Function App in your Azure Portal
- Create a function (clicking on New function, not using the wizard)
- Use GenericWebHook-CSharp as template
- Name it CheckOrderLimit
- Insert and test code
#r "Newtonsoft.Json"

using System;
using System.Net;
using Newtonsoft.Json;

public static async Task<object> Run(HttpRequestMessage req, TraceWriter log)
{
    log.Info($"Checking order limit...");

    string jsonContent = await req.Content.ReadAsStringAsync();
    var data = JsonConvert.DeserializeObject<OrderData>(jsonContent);

    bool isBelowLimit = data.PricePerItem * data.Amount < 1000;

    return req.CreateResponse(HttpStatusCode.OK, new {
        isBelowLimit
    });
}

public class OrderData
{
    public int Amount { get; set; }
    public decimal PricePerItem { get; set; }
}
- Add the Azure function to your Logic App workflow
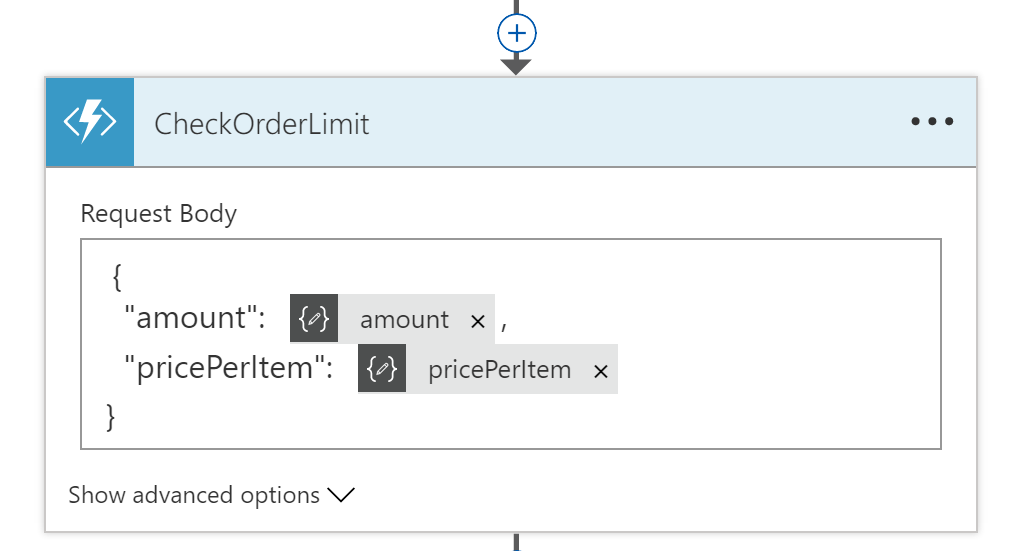
Condition and approval mail
Next add a condition based on the answer of the Azure Function.
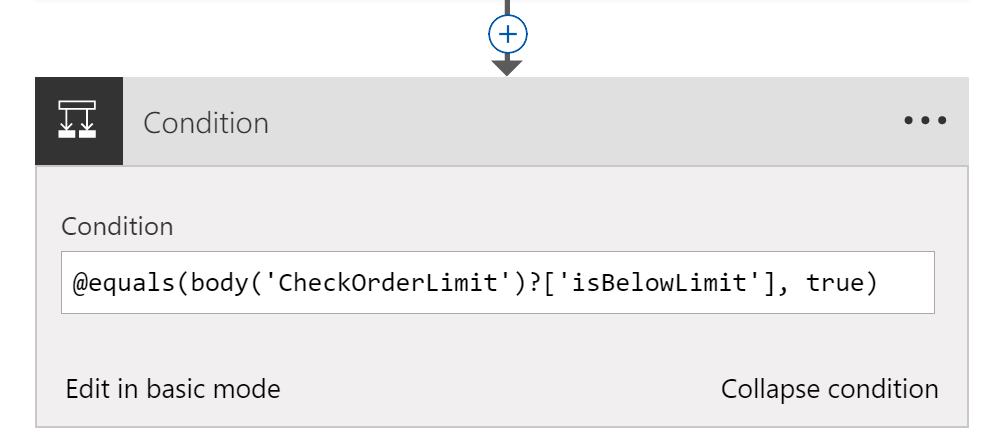
- Add a condition
- Switch to advanced mode: the expression cannot be inserted through the designer
- Set the condition to
@equals(body('CheckOrderLimit')?['isBelowLimit'], true)
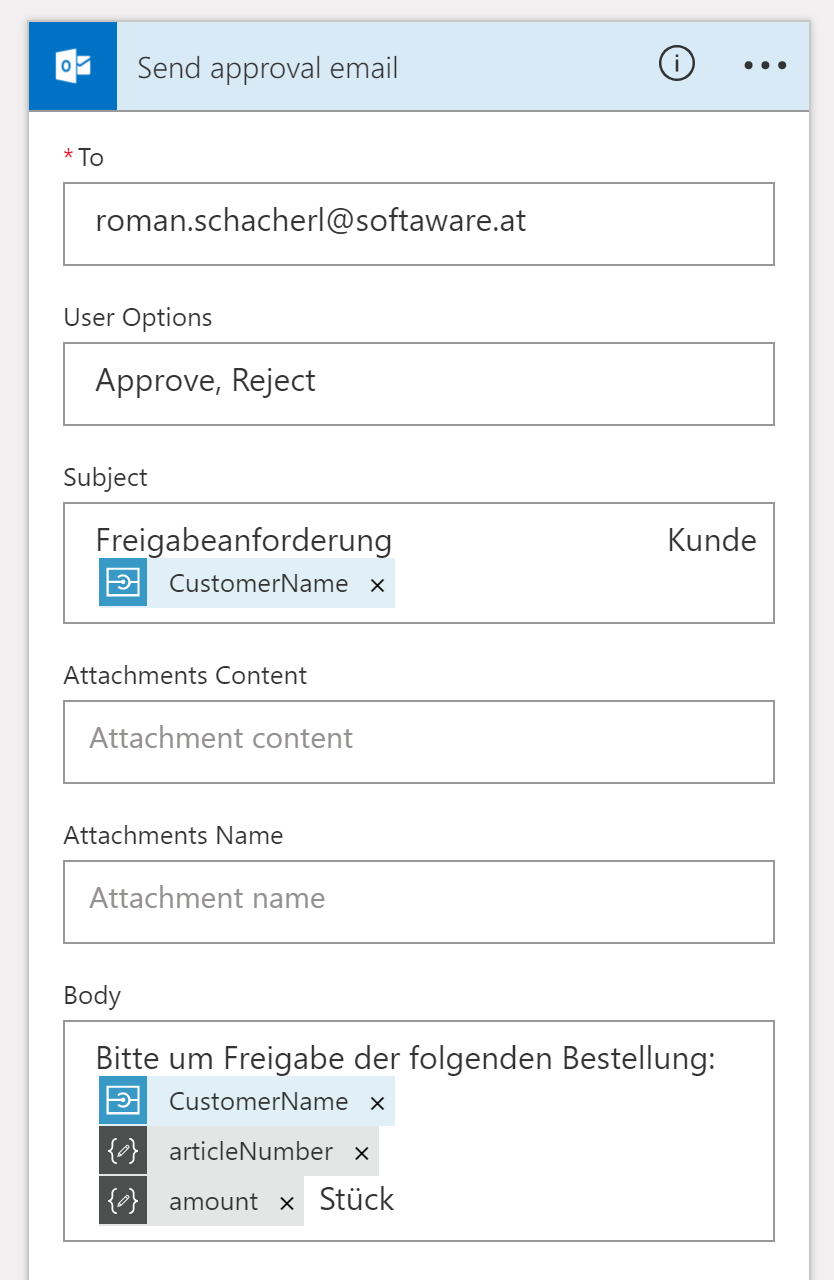
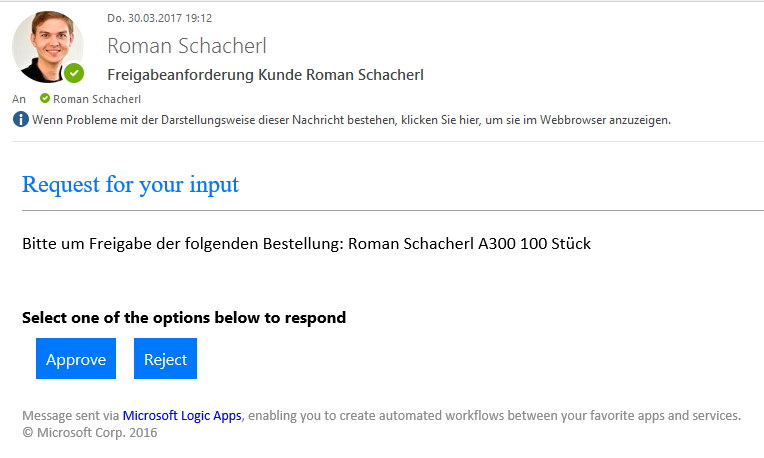
- In the IF NO section add an existing action from the Office 365 group called Send approval email.
- Sign in to your Office 365 account
- Fill out the relevant fields
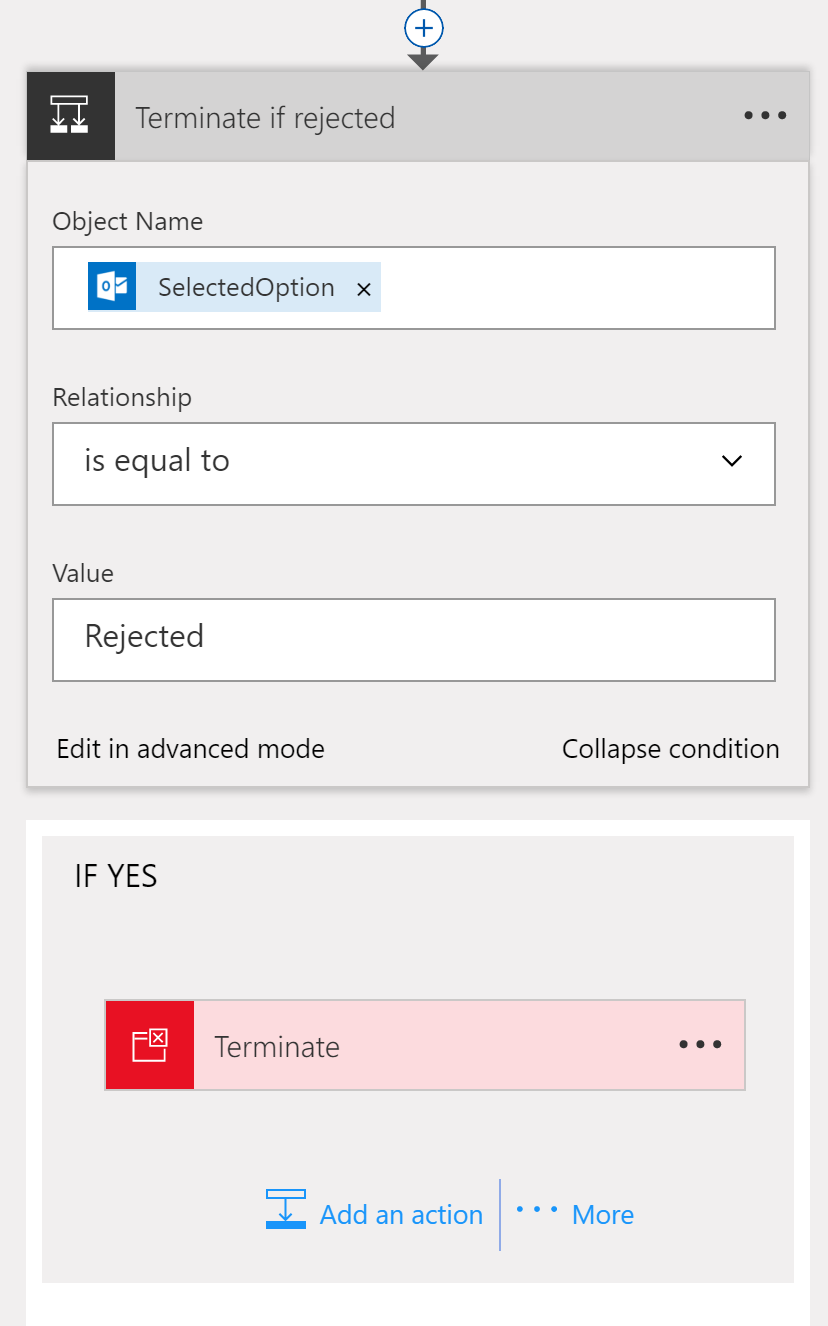
To stop the workflow add another condition afterwards and terminate if the answer of the approval mail was Rejected.
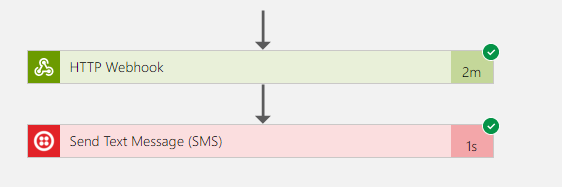
Long-running operations: Webhooks
At the end of this scenario I want to simulate a long-running operation: think of an internal process that takes some hours or maybe even days until the delivery starts. Afterwards we want to notify the customer through a text message (SMS) and maybe provide a tracking number.
Again we use a Web API for that - but with an important difference: the Logic App calls our Web API providing a callback URL. Then the workflow pauses, waiting for a POST request to exactly that callback URL. No polling required, we call the Logic App workflow whenever we are ready to continue.
- Create a new ASP.NET Web Application project
- Choose Empty and add Web API
- Create a DeliveryController
public class DeliveryController : ApiController
{
    [HttpPost]
    [Route("api/delivery/subscribe")]
    public HttpResponseMessage Subscribe([FromBody]SubscriptionData subscriptionData)
    {
        return Request.CreateResponse(HttpStatusCode.OK);
    }

    [HttpPost]
    [Route("api/delivery/unsubscribe")]
    public HttpResponseMessage Unsubscribe([FromBody]SubscriptionData subscriptionData)
    {
        return Request.CreateResponse(HttpStatusCode.OK);
    }
}

public class SubscriptionData
{
    public string CallbackUrl { get; set; }

    public string OrderId { get; set; }
}
- Deploy the web api to an Azure API App using a Debug build (we’ll connect with a remote debugger afterwards)
- Add a new HTTP Webhook action at the end of your workflow and specify the parameters

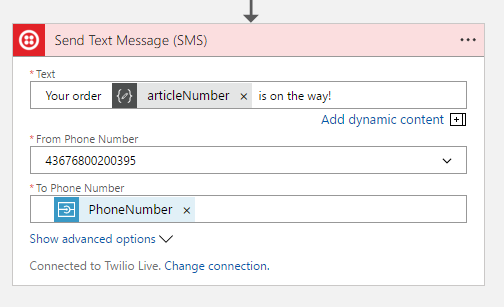
Send a text messages (SMS)
The last step is using Twilio to send a text message. You will need at least a demo account to try things out.
- Add a Send Text Message (SMS) action to your workflow
- Create a Twilio Connection
- Specify the parameters (change the From Phone Number to your specific Twilio phone number)
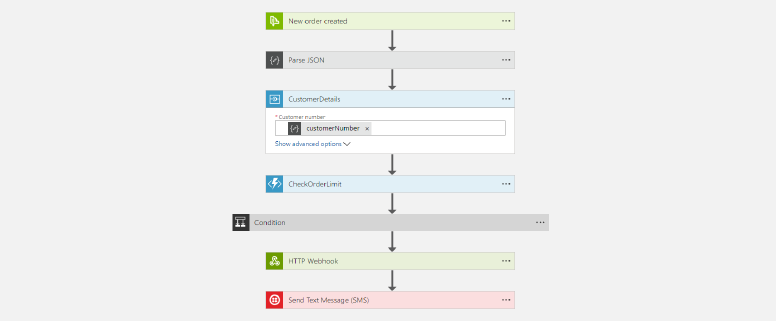
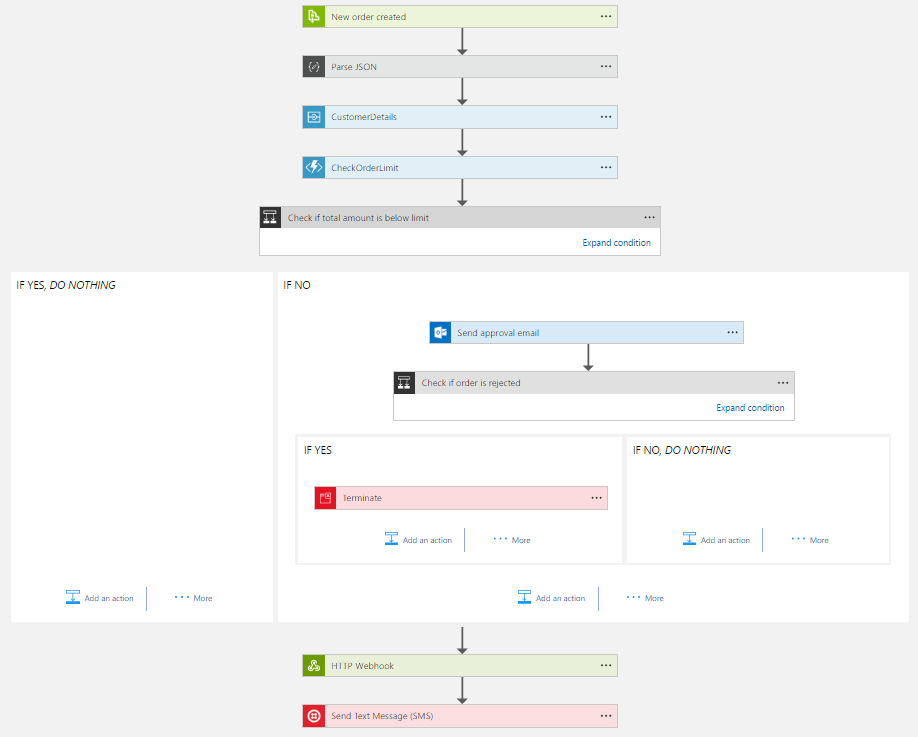
Try it out!
We’re done! Before we give it a try, I’ll show you the complete workflow in one picture:
Add a message to your queue
To test your workflow you have to add a message to your queue.
- Create a small Console application
- Add the WindowsAzure.ServiceBus and Newtonsoft.Json NuGet packages
- Create a new shared access signature for your orders queue, this time with Write permissions
- Use that connection string in the following code sample
// change the connection string to your queue (write-enabled)!
var client = QueueClient.CreateFromConnectionString("Endpoint=sb://logicappvienna.servicebus.windows.net/;SharedAccessKeyName=WriteKey;SharedAccessKey=XXX;EntityPath=orders");

var order = new
{
    customerNumber = "1234",
    articleNumber = "A300",
    pricePerItem = 12.50,
    amount = 100
};

var json = JsonConvert.SerializeObject(order);

var message = new BrokeredMessage(new MemoryStream(Encoding.UTF8.GetBytes(json)));

client.Send(message);
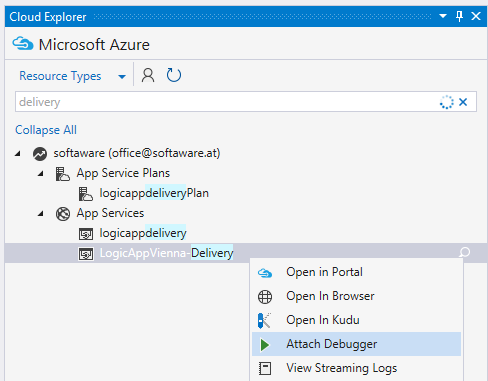
Attach a debugger to your Webhook API
- Start a remote debugging session for your Webhook API
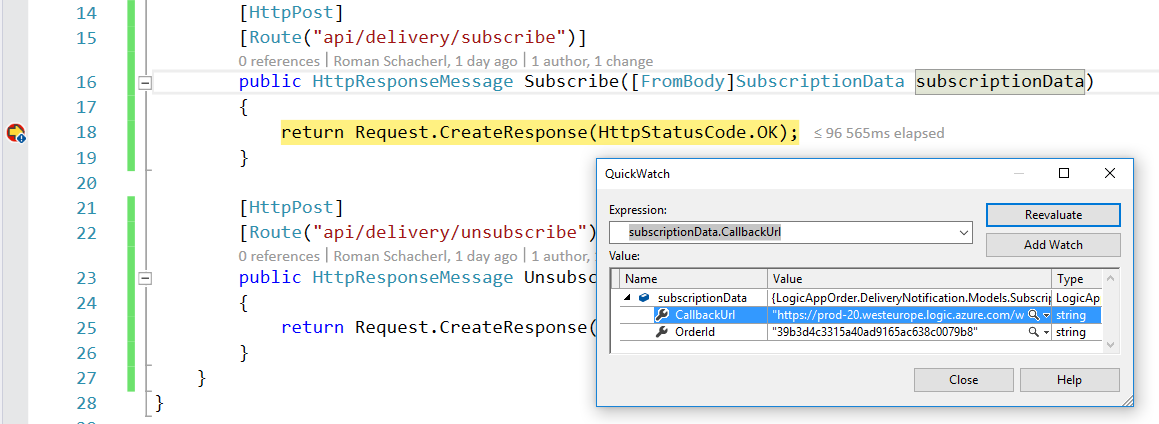
- Set a breakpoint within the Subscribe method so that we can grab the callback uri
Run the workflow
Wait for the approval mail
Check your inbox and approve the order.
Grab the callback url
The Logic App should call your subscribe method and as soon the breakpoint is hit, just copy the callback url and hit F5 to continue the request.
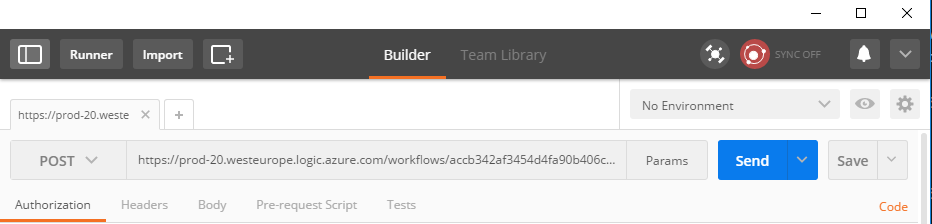
Send a POST request to the callback url
Simulate the start of delivery by sending a POST request to the copied callback url. You can use Postman for that.
Done!